About
Localization is the process of adapting your online store so it feels native to visitors from different countries and language backgrounds. This includes translating your storefront text into other languages, showing prices in local currencies, and adjusting the shopping experience based on a visitor's region.
Shopify has a built-in localization system that handles language and country/region switching. When a visitor picks a different language, Shopify serves translated versions of your theme text, product descriptions, and other content. When they choose a different country, Shopify can display prices in that country's currency (if you have enabled it in your Markets settings).
The Boardwalk theme takes full advantage of this system and ships with a set of components that make it easy for visitors to switch languages and regions. It also includes built-in translations for all of the theme's interface text — buttons, labels, form fields, navigation cues, and more — so your storefront looks polished from the moment you enable a new language.
How Localization Works in Shopify
Shopify's localization system is made up of two main parts: languages and markets (countries/regions). Understanding how these work together will help you set up your store correctly.
Languages
Every Shopify theme contains translation files — these are text files that hold all of the words and phrases used throughout the theme's interface. When you add a language to your store, Shopify looks for a matching translation file and uses it to display theme text in that language. This covers things like "Add to cart," "Search," "Sold out," and other labels that are part of the theme itself.
Your own content — such as product titles, descriptions, collection names, blog posts, and pages — needs to be translated separately. You can do this manually in the Shopify admin or by using a translation app from the Shopify App Store.
Markets (Countries and Regions)
Shopify Markets let you define which countries or regions your store sells to and how each one is configured. Each market can have its own currency, language options, pricing adjustments, and even a custom domain or subfolder. When a visitor selects a different country, Shopify updates the currency and available languages to match that market's settings.
For example, you might set up a market for France that shows prices in euros and defaults to French, alongside a market for Brazil that shows prices in Brazilian real and defaults to Portuguese.
Note: Languages and markets are configured
in your Shopify admin, not in the theme editor. Go to
Settings → Languages to add or remove
languages, and Settings → Markets to
configure your selling regions and currencies.
Built-In Translations
Boardwalk includes pre-written translations for all of the theme's user-facing text. This means buttons, labels, form placeholders, error messages, accessibility text, and navigation cues are already translated and ready to use the moment you enable a supported language in your Shopify admin.
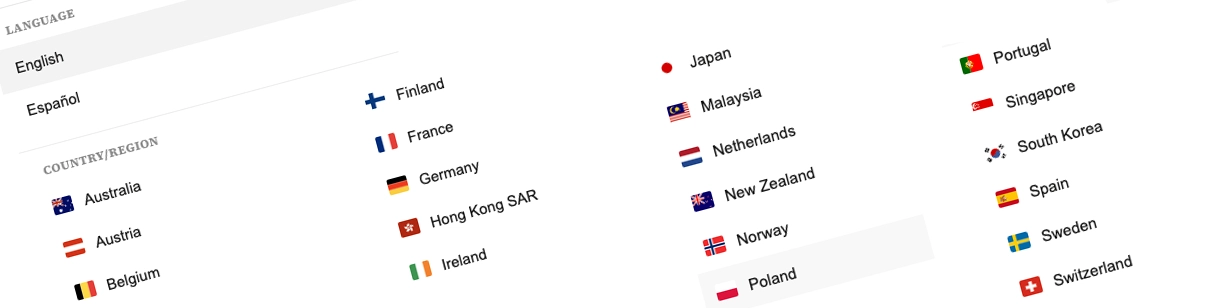
The following languages are included out of the box:
Supported Languages
The default language. All theme text is authored in English and used as the base for all other translations.
Français
Italiano
Deutsch
Español
Português (Brasil)
日本語
Nederlands
Svenska
Dansk
Norsk bokmål
한국어
Note: These translations cover
theme interface text only — things like button
labels, form fields, and system messages. Your own content
(product titles, descriptions, blog posts, pages, etc.) must
be translated separately in
Settings → Languages or by using a
translation app.
How to Set Up Localization
Follow these steps to enable multiple languages and countries on your store and display the localization controls in the Boardwalk theme.
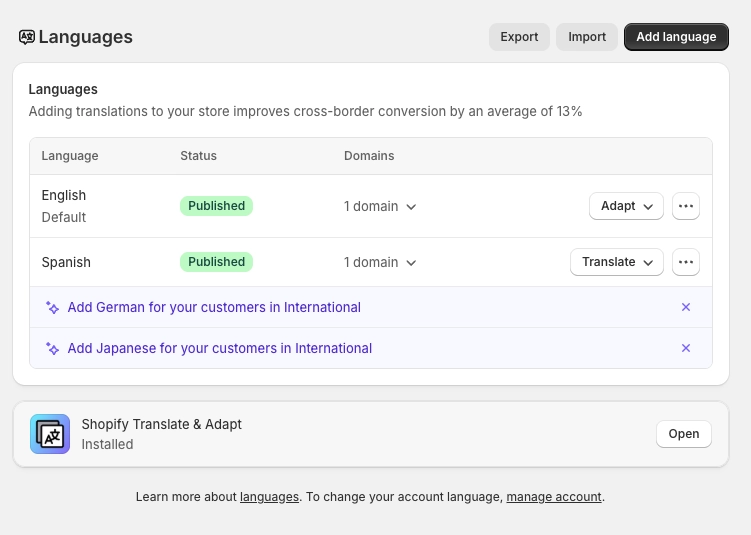
Add Languages in Shopify Admin
In your Shopify admin, go to
Settings → Languages. Click
Add language, choose the language you
want to offer, and click Add. Once added,
the language will appear as "Unpublished" until you click
Publish to make it live on your
storefront.
Note: You must publish a language before it will appear as an option for your visitors. Unpublished languages are only visible to store admins.
Set Up Markets
Go to
Settings → Markets in your Shopify
admin. Here you can define which countries or regions your
store sells to. Each market can have its own currency,
languages, and pricing rules. Add or edit markets to match
the regions you want to serve. Shopify creates a "Primary"
market by default based on your store's home country.
Assign Languages to Markets
Inside each market's settings, you can choose which
languages are available for that region. For example, you
might assign both English and French to a Canadian market.
Only languages that have been published in
Settings → Languages can be assigned to
markets.
Open the Theme Editor
In your Shopify admin, go to
Online Store → Themes, find Boardwalk,
and click Customize. Navigate to the page
where you want to display the localization button (most
commonly the header or footer).
Add a Localization Button Block
In the Theme Editor sidebar, click into the section where you want the localization control to appear (such as your header or footer). Click Add block and choose Localization Button. This adds a button that visitors can click to open the language and region selector.
Configure the Localization Button
Click on the Localization Button block to open its settings. Choose what information to show on the button — such as the country name, currency code, language, and icon style. You can also set the alignment of the button within its container.
Translate Your Content (Optional)
While Boardwalk's theme text is already translated for
supported languages, your own store content needs to be
translated separately. Go to
Settings → Languages, click on a
published language, and you'll see options to translate
products, collections, pages, blog posts, and more. You
can translate these manually or use a translation app.
Note: If you skip this step, visitors who switch languages will see the translated theme interface (buttons, labels, etc.) but your product names, descriptions, and other content will remain in the original language.
Save and Preview
Click Save in the Theme Editor. Visit your storefront and click the localization button to confirm that your languages and countries appear correctly. Try switching between options to verify that everything updates as expected.
Localization Button Block
The Localization Button is a block you can add to any section that supports blocks — most commonly your header or footer. It displays the visitor's current country and/or language selection and opens the localization drawer when clicked.
Localization Button Settings
Choose the icon displayed to the left of the button
text. Options: None, Globe, or
Flag. The globe shows a generic globe icon,
while the flag shows the flag image of the currently
selected country.
Displays the full name of the visitor's currently selected country (e.g., "United States" or "France").
Displays the currency code of the selected country next to the country name (e.g., "USD" or "EUR"). When the country name is also visible, the currency code appears in parentheses.
Displays the name of the currently active language in its native form (e.g., "Français" instead of "French"). This option is automatically hidden if your store only has one published language.
Adds a small chevron arrow to the right side of the button, giving visitors a visual cue that clicking the button will open a panel.
Controls the position of the button within its
container. Options: Left,
Center, or Right.
Note: The Localization Button automatically hides itself when your store has only one published language and one selling country. There is nothing for the visitor to change in that scenario, so the button is not displayed.
Localization Drawer
When a visitor clicks the Localization Button, a slide-out panel (called a "drawer") opens from the right side of the screen. This drawer is where visitors choose their preferred language and country/region.
Language Section
If your store has more than one published language, the drawer displays a list of available languages at the top. The currently active language is highlighted with a checkmark. Visitors can tap any language to select it. Languages are shown using their native name (for example, "Deutsch" instead of "German") so that visitors can easily identify their preferred language.
Country/Region Section
Below the language list, the drawer shows all available countries and regions. Each option displays the country's flag, name, and currency code. The currently selected country is highlighted with a checkmark.
When a visitor selects a different language, the country list automatically updates to show only the countries that support that language. Countries that don't offer the selected language are dimmed and cannot be selected. This prevents visitors from choosing an invalid combination of language and country.
Update Button
At the bottom of the drawer, an Update button confirms the visitor's selections. Clicking it submits the new language and country choice to Shopify, which reloads the page with the updated locale and currency. This means the visitor's choices are applied instantly without navigating to a different page first.
Built-In Features
The localization system in Boardwalk includes several features that work automatically once you've set up languages and markets in your Shopify admin.
Feature Overview
When a visitor selects a language in the drawer, the list of available countries automatically updates to show only countries that support that language. Countries that don't support the selected language are dimmed and cannot be chosen, preventing invalid combinations.
If a visitor switches to a language that their currently selected country doesn't support, the drawer automatically selects the first available country that does. This ensures the visitor always has a valid language and country combination.
The Localization Button block automatically hides itself when your store has only one language and one selling country. No need to manually remove the block — it simply won't display until there's something for the visitor to change.
Each country in the drawer displays its flag image alongside its name and currency code. This makes it easy for visitors to visually scan and find their country. The Localization Button can also be configured to show the currently selected country's flag instead of the globe icon.
Languages in the drawer are always displayed using their native name (e.g., "Deutsch" for German, "日本語" for Japanese). This ensures visitors can identify their language even if they don't read the store's current language.
Each country option in the drawer shows the associated currency code (e.g., USD, EUR, JPY). The Localization Button can also display the currency code, so visitors can see their active currency at a glance without opening the drawer.
The drawer and all of its controls are fully keyboard navigable and include proper screen reader labels. The drawer traps focus while open, uses correct ARIA roles, and supports closing with the Escape key or by clicking the backdrop.
For visitors who have enabled "reduce motion" in their device settings, all drawer animations and transitions are automatically disabled for a more comfortable experience.
Frequently Asked Questions
Settings → Languages and check that
the language shows as "Published" (not "Unpublished").
If it's still unpublished, click the language and then
click Publish. Also make sure the
language is assigned to at least one market in
Settings → Markets.
Settings → Languages by clicking on
the language and translating each piece of content, or
by installing a translation app from the Shopify App
Store.
Settings → Languages by editing the
theme content section for that language.
Settings → Languages or
add another country/region to your markets in
Settings → Markets.
Settings → Markets, open the relevant
market, and add the language to that market's
configuration.
Settings → Markets. When a visitor
selects a different country, Shopify automatically
converts and displays prices in that country's currency.
You can also set specific fixed prices per market if you
don't want to use automatic currency conversion.