About
An article page is the individual blog post view in your Shopify store. When a customer clicks on a blog post from your blog listing, they land on the article page, which displays the post's featured image, title, body content, tags, author information, and optionally a comments section.
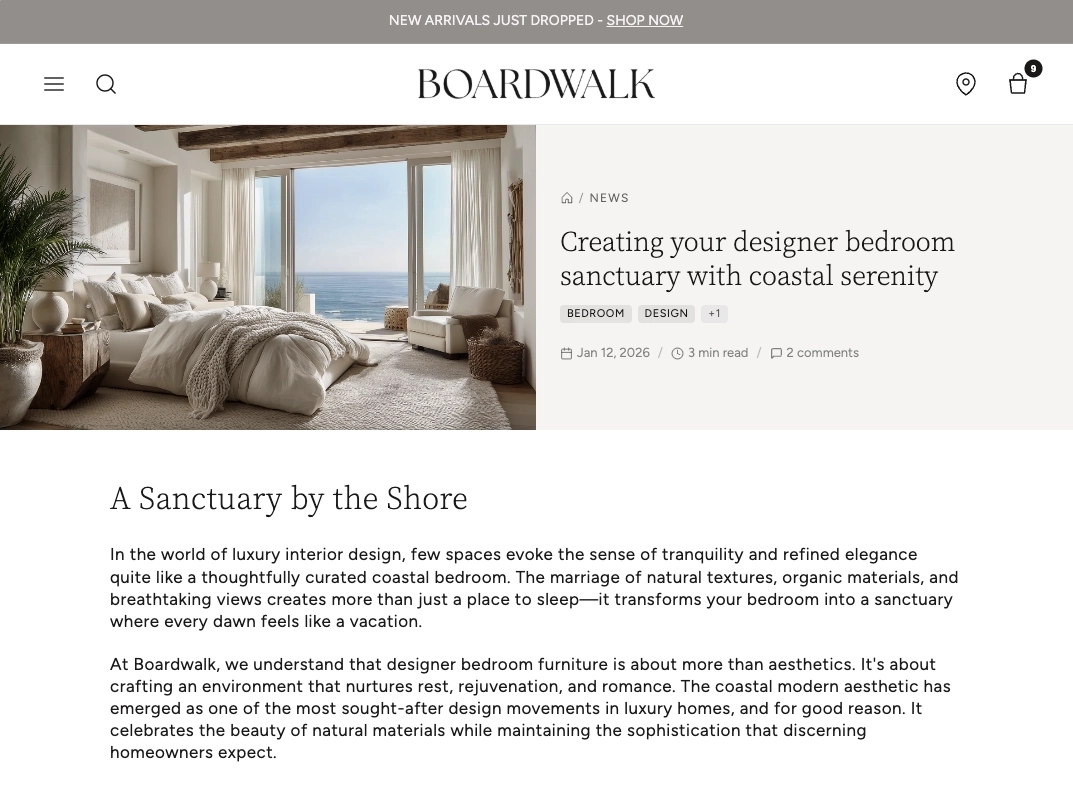
In the Boardwalk theme, the Article section is built with a modular, block-based architecture. It uses a three-part layout: a Header (split image + content), a Group (article body and supporting blocks), and a Comments area. Every element — from the title and tags to the share buttons and back link — is an independent, reorderable block you can add, remove, or rearrange directly in the Shopify Theme Editor.
How to set up the Article Section
Follow these steps to configure and publish your article pages in Shopify using the Boardwalk theme.
Create a Blog and Write Articles
In your Shopify admin, go to
Content → Blog posts. Create a blog (e.g., "News"
or "Journal") if you don't already have one, then add your
articles with a title, body content, featured image, and tags.
Open the Theme Editor
Navigate to Online Store → Themes, find
Boardwalk, and click Customize. In the page
selector dropdown at the top center, choose
Blog posts → Default blog post (or any custom
article template you've created).
Configure the Article Header
Click Article header in the sidebar. Set the split layout between image and content, choose image position (left or right), column widths, text alignment, and a color scheme. Add child blocks like Title, Tags, Meta, Excerpt, Author, or Share inside the header.
Set Up the Article Group
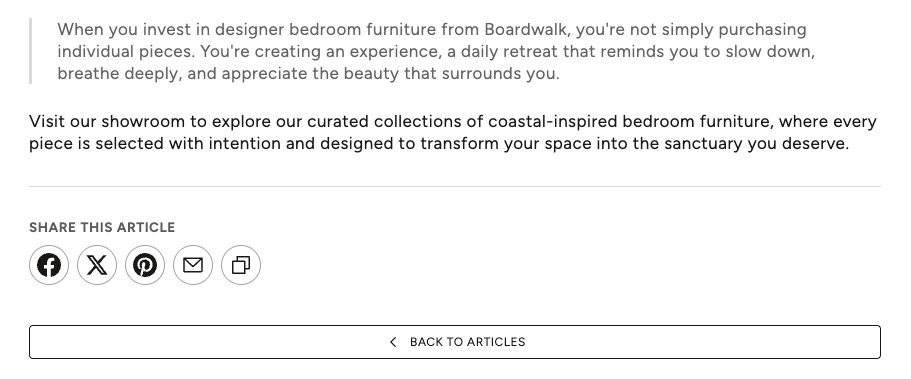
Click Article group in the sidebar. This is the main content wrapper. Inside it, add the Article body block (which renders your rich text content), along with optional blocks like Divider, Article Share, or a Back Button.
Enable Comments (Optional)
The Comments block only appears if comments
are enabled. Go to Shopify Admin → Blog posts,
click Manage blogs, select your blog, and set
comments to either "Comments are allowed, pending moderation"
or "Comments are allowed, and are published automatically."
Adjust Content Width
At the section level, click the Article section itself (not a child block) to access the Content width setting. Choose between Narrow (720px), Medium (900px), or Page (full page width).
Save and Preview
Click Save in the top right corner. Use the preview option or visit a published blog post to see your article page live. Test the layout on mobile to make sure everything looks great on smaller screens.
Section-Level Settings
These settings apply to the entire Article section and are accessible by clicking the top-level section in the Theme Editor sidebar.
Article Section Settings
Controls the max width of the article body, comments, and
inner content blocks. Options:
Narrow (720px), Medium (900px), or
Page (matches your theme's full content width).
Default: Narrow.
Parent Blocks
Parent blocks serve as top-level containers that hold and organize child blocks within the section.
Article Header
A parent block that renders a split layout with the featured image on one side and your configurable content blocks on the other.
- Header width — Page or Full width
- Content max width — None, Narrow (600px), or Extra narrow (400px)
- Column gap — None, Small, Medium, or Large
- Image position — Left or Right
- Image width — Narrow (33%), Standard (50%), or Wide (66%); desktop only
- Alignment — Text, horizontal, and vertical alignment controls
- Color scheme — Select any defined color scheme
- Padding — Top, bottom, edge, and inner padding
Article Group
A parent block that wraps the main content area below the header. Provides shared color scheme and padding for child blocks.
- Color scheme — Select any defined color scheme
- Padding — Top and bottom padding
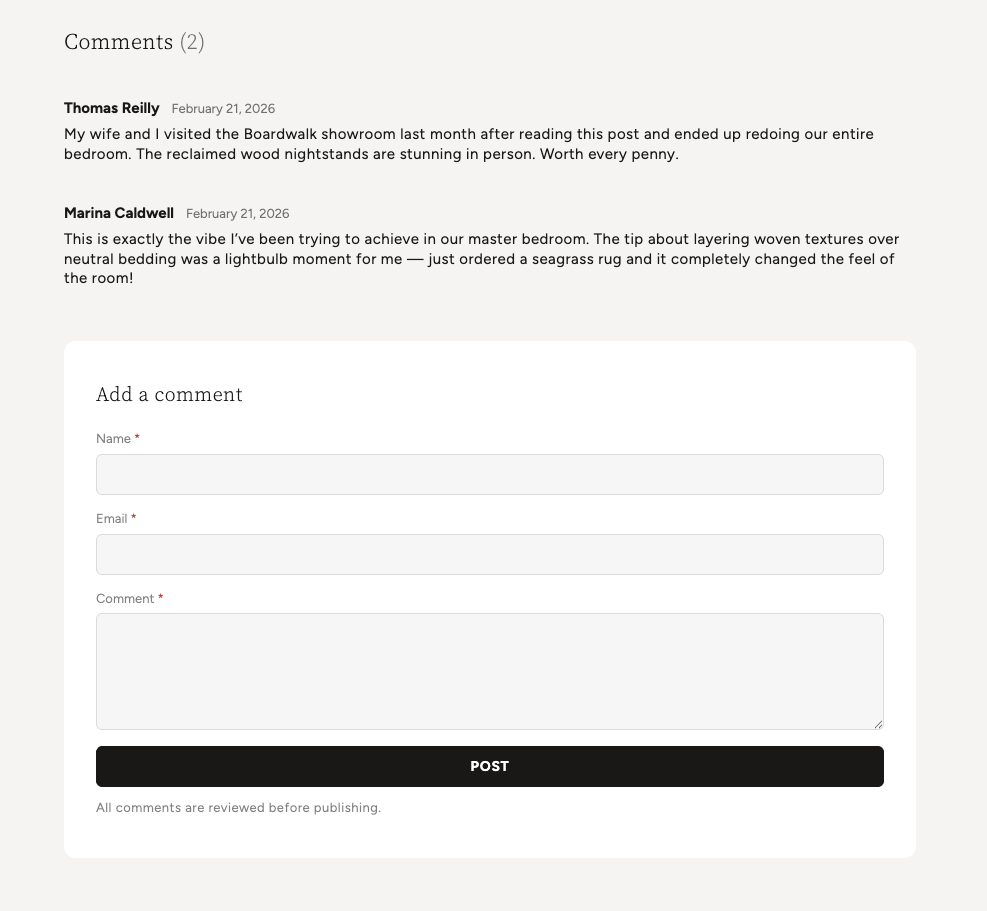
Comments
Full comments section with AJAX pagination and a new comment form. Rendered at section level for full-width support.
- Show comment date — Toggle date on each comment
- Comments per page — 5 to 50
- Section color scheme — For the background area
- Card color scheme — For the comment form card
- Card border radius — 0px to 40px
- Card shadow — Toggle drop shadow
- Padding — Top and bottom
Child Blocks
Child blocks are added inside parent blocks to build your desired layout — arrange, reorder, or remove them to customize the appearance.
Article Media
Renders the article's featured image. If no image is set, a placeholder icon is displayed.
- Aspect ratio — Adapt, Widescreen (16:9), Standard (4:3), Landscape (3:2), Square (1:1), or Portrait (3:4)
Article Title
Displays the article's title as a heading with fully customizable typography.
- Font family — Heading, Body, Menu, or Caption
- Font weight — Light, Normal, Medium, or Bold
- Font size — 14px to 48px
- Line height — 1.0 to 2.0
- Letter spacing — Tight, Normal, Wide, or Extra wide
- Padding — Top and bottom
Article Tags
Shows the article's tags as small, styled badges. Tags are assigned in the Shopify admin blog editor.
- Max tags — 1 to 5
- Show more indicator — Display a "+N" badge for additional tags
- Font size — 9px to 16px
- Background and text color — Custom colors for the tag badges
- Border radius — 0px to 20px
- Gap — Spacing between tags
Article Meta
A compact, all-in-one metadata line combining the date, author name, read time, and comment count with configurable separators.
- Date — Show/hide, show icon, format (Full, Abbreviated, Numeric US, Numeric EU, ISO)
- Author — Show/hide, show icon
- Read time — Show/hide, show icon (auto-calculated at 200 wpm)
- Comments count — Show/hide, show icon, show when zero
- Separator — Dot (·), Dash (—), Slash (/), or Pipe (|)
- Typography — Font family, size (10–18px), and opacity
Article Date
A standalone date block with six format options including relative "time ago."
- Date format — Full, Abbreviated, Numeric US, Numeric EU, ISO, or Relative ("3 days ago")
- Show icon — Toggle calendar icon
- Typography — Font family, size, and opacity
Article Author
Displays the article's author name with an optional prefix and user icon.
- Prefix — Custom text before the name (e.g., "By", "Written by")
- Show icon — Toggle user icon
- Typography — Font family, size, and opacity
Article Excerpt
Renders a short preview. Uses the excerpt field if set, otherwise auto-generates from body content.
- Excerpt length — 50 to 300 characters
- Max lines — 1 to 6 (CSS line clamping)
- Typography — Font family, size, line height, and opacity
Article Read Time
Auto-calculates estimated reading time at 200 words per minute.
- Format — Short ("5 min"), Abbreviated ("5 min read"), or Full ("5 minutes read")
- Show icon — Toggle clock icon
- Typography — Font family, size, and opacity
Article Body (Content)
Renders the full rich text content from the Shopify blog post editor with automatic styling for headings, paragraphs, images, blockquotes, and lists.
- Padding — Top and bottom padding
Article Share
Social sharing buttons with a "Copy link" toast. Can be placed in the header or the group.
- Label — Show/hide, customizable text
- Platforms — Facebook, X (Twitter), Pinterest, LinkedIn, Threads, Bluesky, Tumblr, Email, Copy link
- Icon size — 16px to 28px
- Gap — 8px to 32px between icons
- Color scheme override — Customize icon colors independently
Back Button
Links back to the parent blog. URL is set automatically — no manual configuration needed.
- Button text — Default: "Back to articles"
- Style — Solid, Outline, Ghost, or Text
- Size — Small or Medium
- Full width — Stretch to fill container
- Show arrow — Left-pointing arrow icon
Admin Steps and Requirements
Some features require action in the Shopify admin before they'll appear in your theme.
Before You Begin
The Comments block will not render unless blog comments are enabled. Go to Shopify Admin → Online Store → Blog posts → Manage blogs, select your blog, and set the comment policy to allow comments.
The Article Tags block only appears when the article has tags assigned. Edit your article in the Shopify blog editor and add tags in the "Tags" field on the right sidebar.
The Article Media block shows the article's featured image. If no featured image is set in the Shopify blog editor, a placeholder icon will display instead.
For the Excerpt block to show a custom preview, add an excerpt in the Shopify blog editor (under "Excerpt" in the sidebar). If left blank, it will auto-generate one from the article body.
The Author block uses the name of the Shopify staff member who created the article. To change it, update the staff account's name in Settings → Users and permissions.
The Article Meta block combines date, author, read time, and comments into a single row. You can also use standalone Date, Author, and Read Time blocks instead.
Frequently Asked Questions
@app blocks. Any Shopify app with theme app
extensions can be embedded directly within your article
layout.