About
A slideshow is a rotating series of full-width slides — each featuring an image or video background — that automatically cycles through content at a set interval. Slideshows are commonly used as hero banners at the top of a homepage to highlight promotions, collections, brand stories, or seasonal campaigns in a visually striking way.
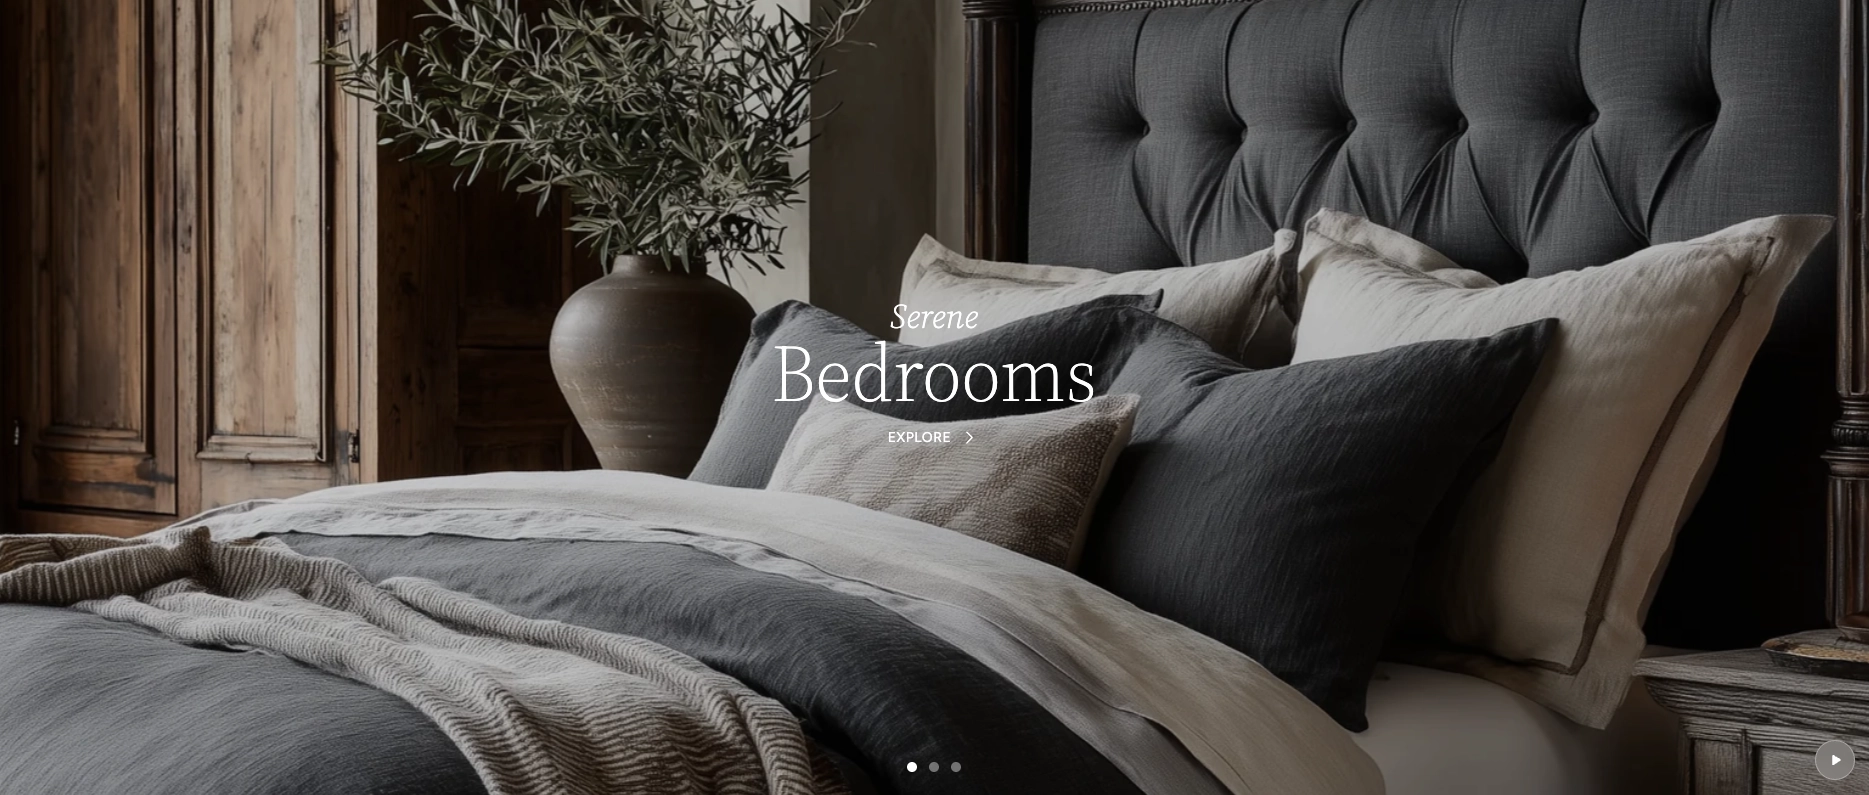
In the Boardwalk theme, the Slideshow section supports both image and video slides with smooth crossfade transitions. Image slides include an optional pan and zoom effect for cinematic motion, while video slides play silently on a loop. Each slide can be overlaid with customizable text, headings, and call-to-action buttons, and text can be positioned anywhere on the slide. The slideshow includes pagination dots, a play/pause toggle, and keyboard accessibility.
How to Set Up the Slideshow Section
Follow these steps to add and configure a slideshow on your storefront using the Boardwalk theme.
Open the Theme Editor
In your Shopify admin, navigate to
Online Store → Themes, find Boardwalk,
and click Customize. Select the page
where you want the slideshow to appear (usually
Home page).
Add the Slideshow Section
Click Add section in the left sidebar and search for Slideshow. Click it to add it to your page. Drag the section to position it where you'd like it to appear — typically at the very top.
Add Image or Video Slides
Inside the Slideshow section, click Add block and choose either Image slide or Video slide. Each block represents one slide in the rotation. Add as many slides as you need.
Upload Media for Each Slide
Click on each slide block and upload an image or video. For image slides, use high-resolution images (at least 2000px wide). For video slides, you can upload a video directly or paste an external MP4 URL.
Add Text and Buttons to Each Slide
Inside each image or video slide, click Add block to insert child blocks like Text (for headings and subheadings), Button (for calls to action), and Spacer (for spacing between elements). Arrange them by dragging to set the reading order.
Configure Section Settings
Click the top-level Slideshow section in the sidebar to set the slide height, content width, pagination dot visibility, color scheme, and text color.
Save and Preview
Click Save in the Theme Editor. Preview your page to verify that slides transition smoothly, text is readable, and buttons link to the correct destinations.
Section-Level Settings
These settings apply to the entire Slideshow section and are accessible by clicking the top-level section in the Theme Editor sidebar.
Slideshow Section Settings
Controls the maximum width of the text content area
within each slide. Options: Page (matches
your theme's content width) or Full (100%
width).
Determines how tall the slideshow appears. Options:
Full window height (fills the entire
browser window),
Adapt to first image (matches the aspect
ratio of the first slide's image), or
Fixed height (uses a specific pixel height
you set for desktop and mobile).
Sets a fixed pixel height for the slideshow on desktop
screens. Only available when Slide height is set to
Fixed height. Range: 300px to 900px.
Sets a fixed pixel height for the slideshow on mobile
screens. Only available when Slide height is set to
Fixed height. Range: 200px to 700px.
Toggles the navigation dots at the bottom of the slideshow. Each dot represents one slide and can be clicked to jump directly to that slide.
Sets the color of the pagination dots. Only visible when Show pagination dots is enabled.
Select any defined color scheme to style the section background. This is visible if your slides don't fully cover the section area.
Sets the global text color for all slide overlays, including headings, subheadings, and button labels. Choose a color that provides strong contrast against your slide backgrounds.
Slide Blocks
Each slide in the slideshow is a block that you add inside the section. There are two types of slide blocks — Image slides and Video slides — and each one can contain child blocks for text content.
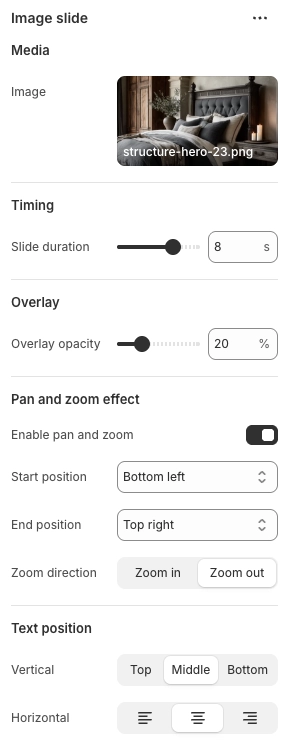
Image Slide
Displays a full-bleed background image with an optional pan and zoom effect that adds subtle cinematic motion as the slide plays. Each image slide can contain text and button overlays.
- Image — Upload a background image. For best results use images at least 2000px wide.
- Slide duration — How long the slide stays visible before transitioning. Range: 3s to 10s.
- Overlay opacity — Adds a dark overlay on top of the image to improve text readability. Range: 0% to 80%.
- Enable pan and zoom — Turns on the slow-motion pan and zoom effect during the slide's display time.
- Start position — Where the pan and zoom effect begins. Choose from 9 positions such as Top left, Center, Bottom right, etc.
- End position — Where the pan and zoom effect ends. Choose from the same 9 positions.
- Zoom direction — Whether the camera zooms in or zooms out during the animation.
- Vertical text position — Places the text overlay at the Top, Middle, or Bottom of the slide.
- Horizontal text alignment — Aligns the text overlay to the Left, Center, or Right.
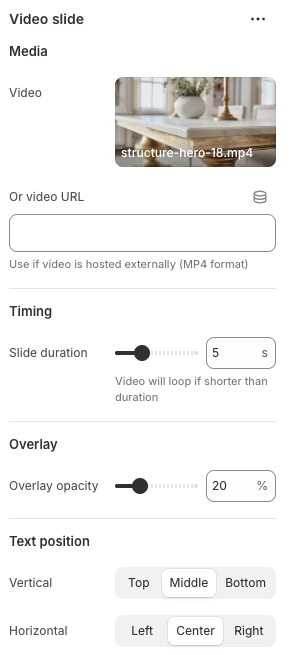
Video Slide
Displays a full-bleed background video that plays silently on a loop. You can upload a video directly through Shopify or provide an external MP4 URL. Each video slide can contain text and button overlays just like image slides.
- Video — Upload a video file through the Shopify admin.
- Or video URL — Paste a direct link to an externally hosted MP4 file. Use this if the video is hosted on your own server or CDN.
- Slide duration — How long the slide stays visible. If the video is shorter than the duration, it will loop. Range: 3s to 10s.
- Overlay opacity — Adds a dark overlay on top of the video to improve text readability. Range: 0% to 80%.
- Vertical text position — Places the text overlay at the Top, Middle, or Bottom of the slide.
- Horizontal text alignment — Aligns the text overlay to the Left, Center, or Right.
Slide Child Blocks
Child blocks are added inside each Image or Video slide to build the text overlay. Arrange, reorder, or remove them to customize what appears on each slide.
Text
Adds a text element to the slide overlay. Use multiple Text blocks to create a subheading above a larger heading, or a heading above a descriptive line. Each Text block has its own typography controls.
- Text — The text content to display on the slide
- Font family — Heading, Body, Caption, or Menu
- Font size — Configurable
- Font weight — Light, Normal, Medium, or Bold
- Letter spacing — Tight, Normal, Wide, or Extra wide
- Line height — Adjustable
Button
Adds a call-to-action button to the slide. Link it to a collection, product, page, or external URL. You can add multiple buttons per slide.
- Button label — The text shown on the button
- Link — The destination URL or page
- Button style — Solid, Outline, Ghost, or Text
- Show arrow — Displays an arrow icon next to the button label
- Full width — Makes the button stretch to fill the available width
Spacer
An invisible spacing block for adding vertical or horizontal padding between other child blocks within the slide overlay.
- Vertical padding — Adjustable
- Horizontal padding — Adjustable
Tip: You can mix Image slides and Video slides in the same slideshow. For example, use two image slides with pan and zoom followed by a short video clip for variety.
Built-In Features
The Slideshow section comes packed with features that work automatically — no apps or custom code needed.
Feature Overview
Slides automatically transition after their set duration. Each slide can have its own timing, so you can show some slides longer than others.
Slides transition with a smooth fade effect rather than a hard cut, creating an elegant and professional feel.
Image slides can use a slow-motion pan and zoom animation (sometimes called the Ken Burns effect) for cinematic movement. Configure the start position, end position, and zoom direction for each slide independently.
A play/pause button appears in the bottom-right corner when the slideshow has more than one slide. Visitors can pause the rotation and resume it at any time.
Clickable dots at the bottom of the slideshow let visitors jump directly to any slide. The active slide's dot is visually highlighted.
The slideshow supports keyboard controls — use the left and right arrow keys to move between slides, and the spacebar to toggle play and pause.
Text content on each slide fades in with a smooth blur-to- clear animation after the slide becomes active, drawing attention to your message.
Video slides automatically begin playing when the slide becomes active and pause when transitioning away. Videos play silently and loop continuously.
The slideshow supports separate height settings for desktop and mobile, or can automatically adapt its height based on the first image's aspect ratio.
Admin Steps and Requirements
Keep these considerations in mind when setting up your slideshow.
Before You Begin
Use high-resolution images at least 2000px wide for the best appearance on large screens. The slideshow fills the entire width of the page, so low-resolution images may appear blurry or pixelated.
To use the Video picker, upload your video files through Content → Files in the Shopify admin first. Shopify supports MP4 video uploads. Alternatively, you can paste a direct URL to an externally hosted MP4 file in the Or video URL field.
Keep video files as small as possible to avoid slow page loads. Compress your videos and aim for files under 10 MB when possible. Short clips of 5–15 seconds tend to work best for slideshows.
If your slide text is hard to read, increase the Overlay opacity on the individual slide block. This adds a semi-transparent dark layer between the media and the text. A value between 20% and 40% usually works well.
For the best cinematic effect, set different start and end positions on each image slide (e.g., start at Bottom left and end at Top right). Alternate zoom directions between slides for added visual interest. The pan and zoom effect is only available on image slides, not video slides.
When Slide height is set to
Adapt to first image, the slideshow uses
the aspect ratio of the first slide's image to determine
its height. Make sure your first slide has an image
uploaded for this mode to work properly.
If you only have one slide, the pagination dots and play/pause button are automatically hidden. The slideshow works perfectly as a static hero banner with a single image or video slide.