About
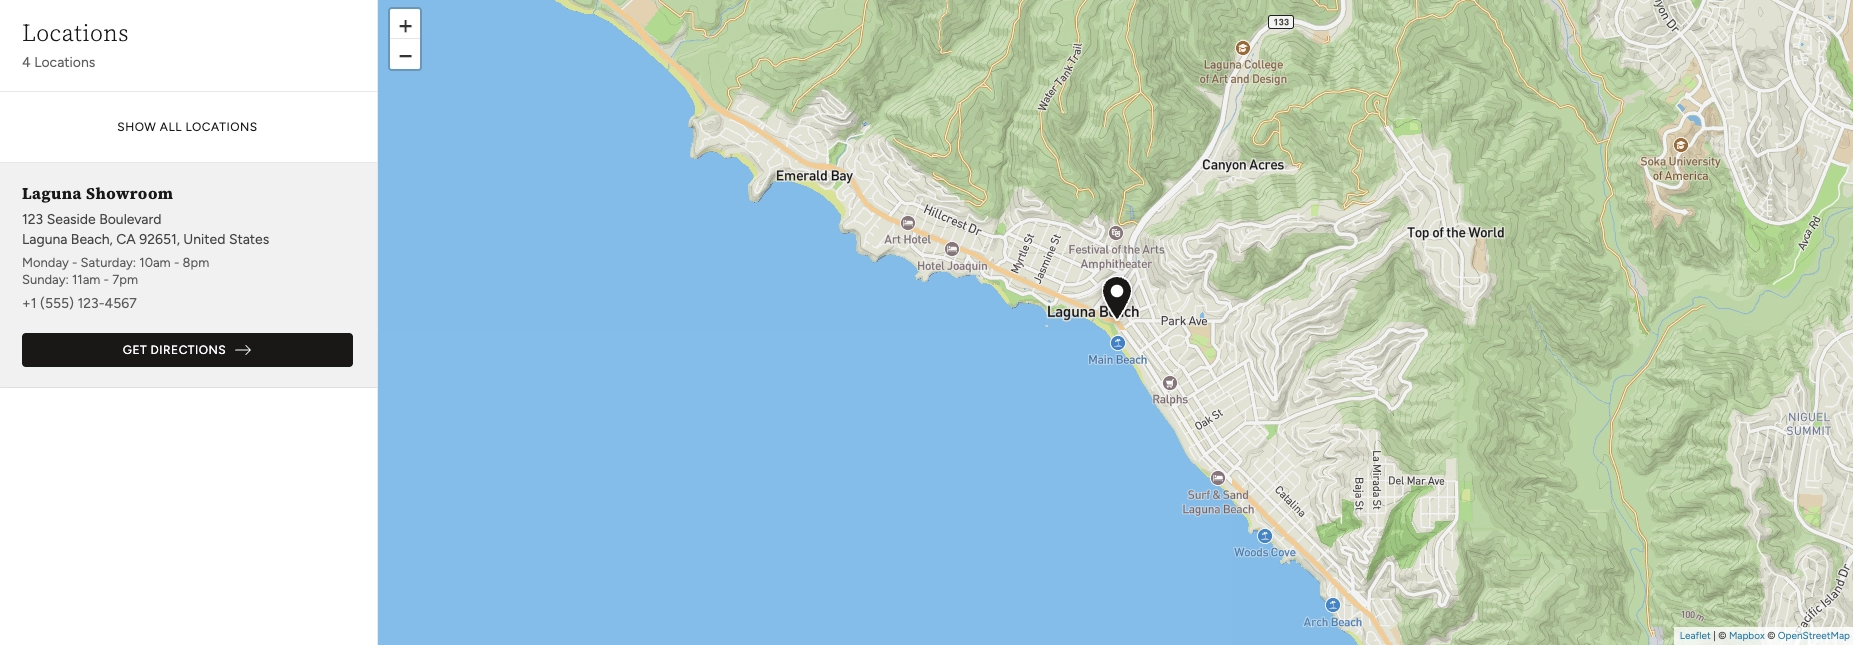
An interactive map shows customers where your physical store, studio, or office is located. It lets visitors see your position on a real map, get directions, and find you more easily. Maps are especially valuable for businesses with brick-and-mortar locations, pop-up shops, or showrooms.
In the Boardwalk theme, maps are powered by Mapbox — a third-party mapping service. The Map theme settings are where you connect your Mapbox account and set the global defaults for how maps look across your store, including the map style and marker appearance. Individual store locations and their addresses are managed separately through the Store locations theme settings and the Map section.
How to Set Up Maps
Follow these steps to connect Mapbox and configure how maps appear on your store.
Create a Mapbox Account
Go to mapbox.com and sign up for a free account. Mapbox offers a generous free tier that covers most small to medium-sized stores. Once you've created your account, navigate to your account dashboard to find your access token.
Note: A Mapbox account is required to display maps on your store. Without an access token, map sections will not render. Mapbox is a third-party service separate from Shopify — you'll need to create your own account at mapbox.com.
Copy Your Mapbox Access Token
In your Mapbox account dashboard, locate your
Default public token (or create a new
one). Copy the full token string — it will look something
like pk.eyJ1Ijoi....
Open Theme Settings
In your Shopify admin, go to
Online Store → Themes, find Boardwalk,
and click Customize. In the Theme Editor,
click the gear icon (⚙) in the left
sidebar to open Theme settings.
Paste Your Access Token
Inside Theme settings, click on Map. Paste your Mapbox access token into the Mapbox maps access token field.
Choose a Map Style
Under Map settings, select a
Map style that matches your store's
design. Options include Streets,
Outdoors, Light,
Dark, Satellite, and
Satellite Streets. This becomes the default
style for all map sections on your store.
Customize the Marker
Under Marker settings, choose a
Marker style (Pin,
Circle, or Flag) and set the
Marker color. These defaults apply to all
location markers across your store.
Save and Preview
Click Save in the Theme Editor. To see your map in action, add a Map section to any page and configure at least one location with an address. The map will render using the style and marker settings you've configured here.
Settings Reference
These settings are found under Theme settings → Map in the Theme Editor.
Mapbox Connection
Your Mapbox public access token. This connects your store to Mapbox's mapping service and is required for any map to display. You can find or create tokens in your Mapbox account dashboard at mapbox.com.
Map Settings
Controls the visual appearance of the map tiles.
Options: Streets (detailed road map),
Outdoors (terrain and trails),
Light (minimal, light-toned),
Dark (minimal, dark-toned),
Satellite (aerial imagery), or
Satellite Streets (aerial imagery with road
labels). Choose a style that complements your store's
design.
Marker Settings
The shape of the marker that identifies your location on
the map. Options: Pin (a traditional map
pin), Circle (a simple colored dot), or
Flag (a small flag icon).
The color of the location marker. Use your brand color or a high-contrast color that stands out against the map style you've chosen. For example, a bright color works well on the Light or Dark map styles.
How Map Settings Work with Sections
The settings here define global defaults. The Map section and Location blocks have their own settings that work alongside — and can override — these defaults.
Global Defaults
The map style, marker style, and marker color you set here act as the default for all Map sections across your store. Any Map section that hasn't been given its own overrides will use these values.
Section-Level Overrides
The Map section includes its own
Map style, Marker style,
and Marker color settings. Each of these
has a Use global setting option that tells it
to inherit the value from these theme settings. If you
choose a specific value instead, it overrides the global
default for that section only. This is useful if you want
different map appearances on different pages.
Location Blocks
Individual locations are added as Location blocks inside the Map section. Each Location block includes its own address, name, street, city, phone number, and business hours. The address is used to position the pin on the map and to provide directions for customers.
Store Locations (Theme Settings)
Boardwalk also has a separate Store locations section in Theme settings where you can manage your locations centrally. These locations are referenced by the Map section and can also be displayed in a locations drawer accessible from the header.
Map Style Guide
Choosing the right map style helps the map blend with your store's design. Here's a quick overview of each option.
Available Map Styles
A detailed road map with street names, landmarks, and points of interest. The most familiar map style — great for helping customers navigate to your location.
A topographic map showing terrain, elevation, and hiking trails. A good fit for outdoor brands, adventure stores, or businesses in rural or scenic areas.
A clean, minimal map with muted colors and a light background. Blends well with modern, light-themed store designs without drawing too much visual attention.
A clean, minimal map with a dark background. Pairs well with dark-themed store sections and makes bright marker colors stand out prominently.
Real aerial photography of the area. Shows the actual landscape, buildings, and surroundings. Useful for helping customers visually identify your building or area.
Aerial photography with road names and labels overlaid on top. Combines the visual context of satellite imagery with the navigational clarity of a street map.
Frequently Asked Questions
Use global setting option. If you select a
specific style instead, that section will use the chosen
style regardless of what's set here in the theme
settings. This lets you have a Dark map on one page and
a Light map on another.